Enswitch - Reports
Learn more about the different reports that can be generated and view through your Enswitch web portal.
Table of Contents
Call Reporting
In the Enswitch web portal, you can generate reports to help monitor your phone system and its activity. These reports can be reviewed through the Reports tab of the sidebar. 
There are four types of reports that can be generated and referenced:
- Active calls - View calls that are actively ringing and being handled in your phone system.
- Call history - Reference a list of calls that have been handled by your users within the last 30 days.
- Call history Archive - Download a .csv file that contains call logs from a month in the past.
- Call statistics - Generate a comprehensive report of statistics that need to be recorded for your purposes.
The Active Calls Report
The Active Calls report can be used to view and hang up active calls that are being handled by your users.
To view your Active calls report, navigate to Reports → Active calls.
On the Active Calls page, you can do the following:
- Use the top menu to filter and sort the calls shown.

- In the Refresh section of the top menu, set how often (in seconds) that the page should refresh to show more current calls.

-
View different active calls and the information of the callers participating in the call.

- Click the View in new page >> button to view these calls in a separate tab.
Hang Up a Call
At some point, it may become necessary to remotely hang up a call. This could be needed to drop a stuck call or prevent a spam/robo caller from wasting the time of your agents.
On the Active Calls page, you can easily hang up calls. Simply, select one or more calls and click the Hang up selected button.
✔ You should see a confirmation message stating that the call has been hung up.

The Call History
Using your web portal, you can check your call history to grab a caller's information, keep record of your calling activity, and more. The Call history page can search for and display calls from the last 30 days.
To view your account's call logs…
- Log into your Enswitch web portal.
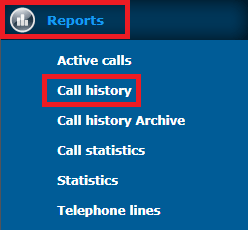
- Navigate to Reports → Call history.

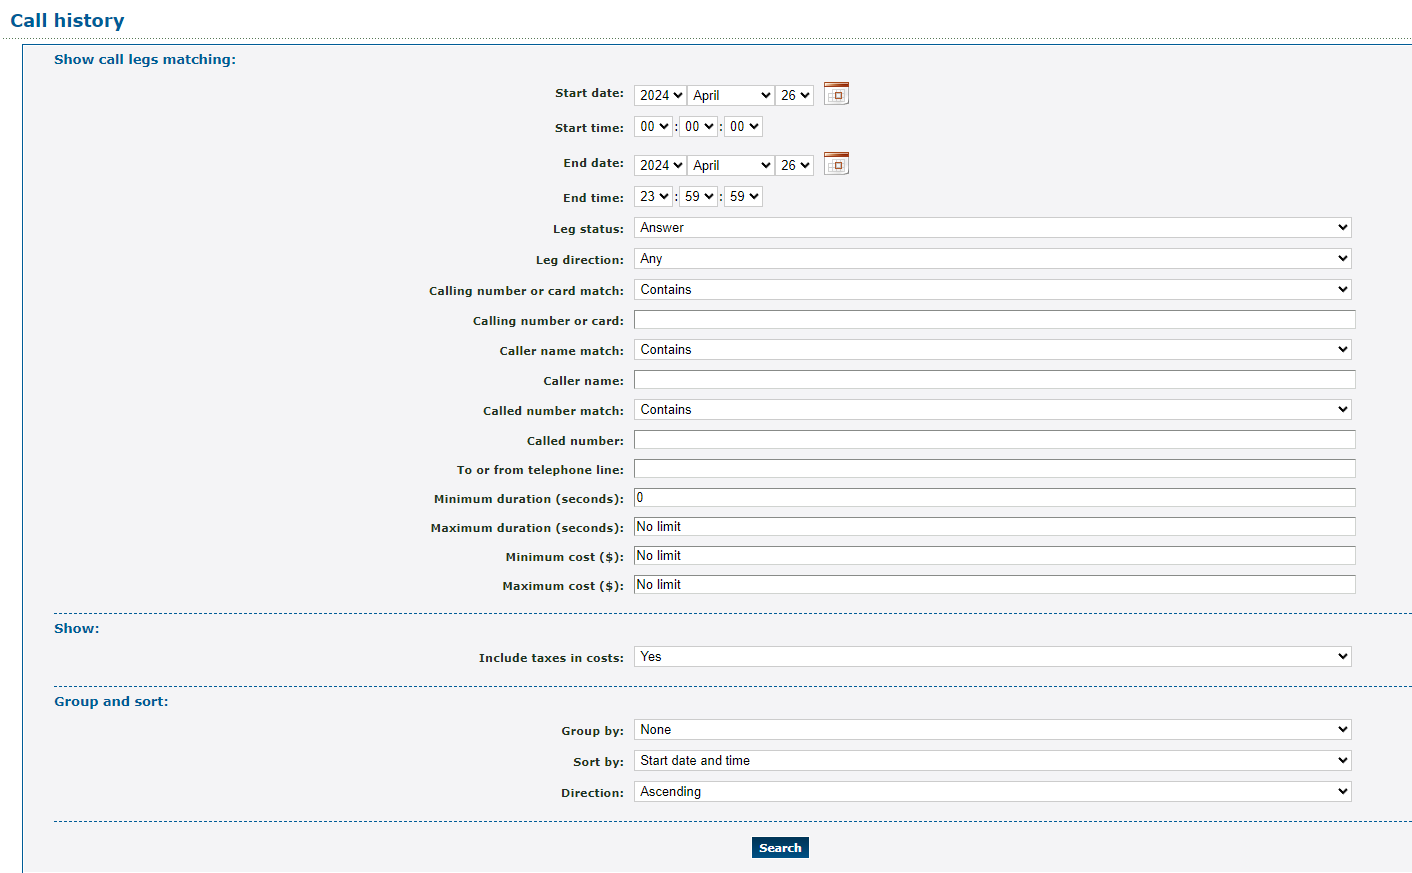
- In the Call history menu, filter the call logs shown using the options below:

| Show call logs matching | Description |
|---|---|
|
• Start date & Start time • End date & End time |
Select the starting and ending date and time of the call(s) you would like to view. |
| Leg status | View either Answered or Unanswered (No Answer) calls. |
| Leg direction | View Any call, or view only Internal, Inbound, or Outbound calls. |
|
• Calling number or card • Caller name • Called number |
Narrow down your results by typing in either the calling number, caller's name, or the called number. |
|
• Calling number or card match • Caller name match • Called number match |
Determine how the system should search for calls based on the information put in for the Calling number or card, caller name, and called number entered in the options shown in the table above. • Exact - Only search for calls that exactly match what is typed in the fields. • Starts with - Search for calls that start with the letters or numbers entered. • Ends with - Search for calls that end with the letters or numbers entered. • Contains - Search for calls that contain the name or numbers entered. |
| To or from telephone line | If needed, type the extension number that handled the call you are looking for. |
| Minimum duration (seconds) & Maximum duration (seconds) | If you do not know the caller's information but you do know how long the call lasted, type in the minimum or maximum duration of the call. |
| Minimum cost ($) & Maximum cost ($) | If you are looking for calls that cost a certain amount, type the minimum or maximum cost of the calls in these fields. |
| Show | Description |
| Include taxes in costs | If you are looking for calls that cost a certain amount, select whether or not to include the taxes in the cost shown. |
| Group and sort | Description |
| Group by | Determine whether the calls should be grouped together by Day, Month, Type, or Type and number. If the Group by option is used, the Sort by option will be hidden. |
| Sort by | Determine the order the results will appear in depending on which of the following factors is selected: • Direction (i.e., Internal, Inbound, or Outbound) • Caller name • Called number • Start date and time • End date and time • Billable time • Cost. |
| Direction | Select if you want the results sorted/grouped in ascending or descending order. |
- Once the filters and options have been set, click the Search button.
✔ You should see a list of calls matching your search parameters.

If needed, click the Export as .csv button to download a spreadsheet of these call logs.
The Call History Archive
If you are looking for a call that is not able to be found in the Call history page due to how long ago it was handled, you can view the Call history Archive to pull a .CSV file of calls from the month of that call.
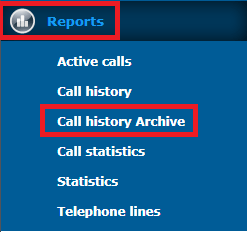
To view your Archive call history page, navigate to Reports → Call history Archive.
In the Archived call history menu, you can find and download that specific month's call logs as a CSV file. You can open the downloaded spreadsheet to find a specific call.
The Call Statistics Report
In a call center environment, it may be necessary to monitor and keep record of your business' call statistics. This can help ensure your business is meeting set standards and expectations.
As an Enswitch admin, you can use the Enswitch web portal to generate different call statistics reports.
To generate and view a Call Statistics report…
- Navigate to Reports → Call statistics.

- On the Call statistics page, click the New report >> button.

- At the top of the Report options menu, fill in the following information:

| Option | Description |
|---|---|
| * Name | Type a descriptive name to use for this specific report. |
| Owner | Select a user that can view and edit this report. |
| Report type |
Select the type of report that needs to be generated. You can generate reports that sort and show call statistics according to either a specific time frame or the destinations that handled the calls. Note: If you create a Destinations report, you can use the Display destinations section to fine-tune what destinations are shown. |
| SLA answer time | If your organization has a Service Level Agreement (SLA) that needs to be followed, you can set the SLA answer time to ensure the “SLA ok” stat shown in the Call statistics section is accurate. |
| Short abandon time |
Set the time limit that a caller has to abandon the call in order for it to be treated as a short abandon call. Note: An abandoned call can be the result of many scenarios affecting by a caller, such as having technical issues, realizing they called the wrong number, or deciding they do not have the time to do a call. |
| Telephone lines title | Select the information that should be shown for a user in the report. |
|
Start day & Start time |
Set a starting time and date that this report should show calls and their statistics. |
|
End day & End time |
Set an ending time and date that this report should show calls and their statistics. |
| Email report |
If needed, emailed reports can be scheduled. Select how frequently a report should be emailed and type the email address(es) that should receive these reports.
For multiple email addresses, separate each email address with a space. |
- Use the Call statistics, Queue statistics, and Queue agent statistics sections to select the types of statistics that should be shown in this report.
Call Statistics
In your report, you can select specific call statistics that should be calculated and displayed.

The following call statistics can be shown in a report:
Note: The number shown for these stats depend on the Report type selected and the destinations that are shown in the Display destinations section.
Option Description Total calls The total number of calls that were handled. SLA ok If you have set the SLA answer time option, you can choose to display how many calls were answered within your set SLA answer time. Answered &
Not answeredHow many calls were answered and not answered by agents. Inbound calls The total number of calls that were dialed to a user/agent. Inbound answered &
Inbound no answerThe number of inbound calls that were answered or not answered by a user/agent. Outbound calls The total number of outbound calls that were made by users and agents. Outbound answered &
Outbound no answerThe number of outbound calls placed by an agent that were answered or not answered. Hold time minimum &
Hold time maximumThe shortest and longest time that calls from a destination/time were waiting on hold.

Hold time average The average time calls were on hold from a destination/time. This is calculated using the Hold time minimum and Hold time maximum stats. Talk time minimum &
Talk time maximumThe shortest and longest time that users were actively on a call for that destination/time.

Talk time average The average time calls were actively being handled. This is calculated using the Talk time minimum and Talk time maximum stats. Total time minimum &
Total time maximumThe shortest and longest time a call was handled within a destination/time.

Note: The total time includes talk time and hold time.
Total time average The average time a call was handled. This is calculated using the Total time minimum and Total time maximum stats. Total time total The total time calls were handled within a destination/time. This total is found by adding up the total time of every call. Queue Statistics
Select the different statistics you want to show that center around your queues.

Option Description Abandoned by caller The number of calls that were abandoned by the caller.
A call may be abandoned due to technical issues on the caller's side or other small issues like the caller realizing they dialed a wrong number.
Short abandon by caller The total number of calls that were abandoned within the set Short abandon time option. No agents available Display how many agents were not available in their queues. Time-out in queue How many calls were not answered in time and followed an exit option. Key press by caller The number of calls where a caller pressed a key on their dialpad. Agent completed The total of calls ended and completed by agents. Caller completed The number of calls ended by a caller. Transfer by agent How many calls were transferred to another destination by an agent. Queue Agent Statistics
If this report is going to focus on agents in your queues, you can show the availability statuses that your agents used and for how long they were on that status.

If your agents do not switch their status while handling calls, then showing these statistics may not be necessary for your report.
- If you are creating a Destinations report, use the Display destinations section to select the different users, callers, numbers, and queues that should be displayed in the report.

Display Destination Options
There are several destinations in the table that you can show and hide. For some special destinations, you can select specific phones, users and queues that can be shown.

Option Description All calls Show or hide the All calls row of the Destinations report

External callers Show or hide the External callers row of the Destinations report

Internal call legs Show or hide the Internal call legs row of the Destinations report

External destinations Show or hide the External destinations row of the Destinations report.

Numbers and codes Select feature codes and numbers that should be shown in the report. For this option, you can select…
• All numbers - Show every number and feature code on your account.
• All with control panel “yes” - Show numbers and feature codes that have had the “Show in control panel” setting enabled.
• Specific numbers - Select dialed phone numbers and feature codes to display as in their own rows.
Queues Select queues that should be shown in the report. For this option, you can select…
• All queues - Show every queue on your account.
• All with control panel “yes” - Show queues that have had the “Show in control panel” setting enabled.
• Specific queues - Select specific queues to display in their own rows.
Queue agents Show all or specific agents that are part of a queue. For this option, you can select…
• All agents - Show every user that is part of a queue.
• All in displayed queue - Show agents that are only part of the queues you have selected in the option above.
• All available in displayed queue - Show agents that are currently set as Available for calls in the queues selected above.
• All with control panel “yes” - Show telephone lines that are set as agents in queues that have had the "Show in control panel" setting enabled.
• Specific agents - Select specific telephone lines (aka extension numbers) that are assigned to a queue to display in their own rows.
Telephone lines Show all or specific telephone lines (aka extension numbers). For this option, you can select…
• All telephone lines - Show every telephone line on your account.
• All with control panel “yes” - Show telephone lines that have had the "Show in control panel" setting enabled.
• Specific telephones - Select specific telephone lines (aka extension numbers) to display in their own rows.
Total Show or hide the Total row from the Destinations report.

- Click the Load data button.
✔ Doing so will load a table of the data selected so far.

This table shown may differ in appearance depending on the Report Type that was selected.
Here is an example of a Days of the week report:
To edit this report's options, click the Open options button on the right.

- If you would like to save this report to use at later dates, click the Save report button.

✔ You should see button change to say “Report saved” and a Save as copy button appear.

If needed, click the Save as copy button to create a copy of this report for the Call statistics page.
View a Call Statistics Report
Once you have created a Call Statistics Report, you can view and edit the report by clicking the name of the report on the Call statistics page. 
While viewing the report, you can use the toolbar on the right to do different things with the report:

While viewing the data of the report, you can get a more detailed view of the calls that contributed to a specific stat.
-
Click the stat that needs to be viewed in more detail.

- In the window that appears, you can view the information of the calls that contributed towards the selected stat.

- If needed, click the Export as .csv button to download a spreadsheet of the data shown.
- Click the Close window button to return to the main view of the table.
