Temporarily Forward Your Own Calls
Discover how you can forward your own calls using the Time Frames and Answering Rules pages.
Table of Contents
Set Up a Temporary Forward
Quick Tip: To implement and adjust a Temporary Forward, you can access the Stratus portal from any device on any network. If you lose power or if you lose internet, you can use your phone's web browser or you can go home and implement the “Temp Forward” time frame you are about to learn how to create.
As a Basic Stratus user, you have the ability to forward your own calls. Forwarding calls can be done by creating a time frame that determines when the forwarding should be active and then configuring an answering rule that determines where calls should be routed.
Create a Time Frame
To add a rule for a temporary forward, we will need to make a Time Frame. To do so…
- Navigate to the Time Frames page.

- In the Time Frames page, click the Add Time Frame button.

✔ Doing so will pull up the Add a Timeframe modal.

- In the Name box, type a name to identify the time frame with later.

- In the When section, make sure Always is selected.

- Click the Save button.

Create a Temporary Forward Answering Rule
Now that the Timeframe is created, we will need to apply it to the answering rules of the user that will need the forwarding.
- Navigate to the Answering Rules page.

- Click the Add Rule button.

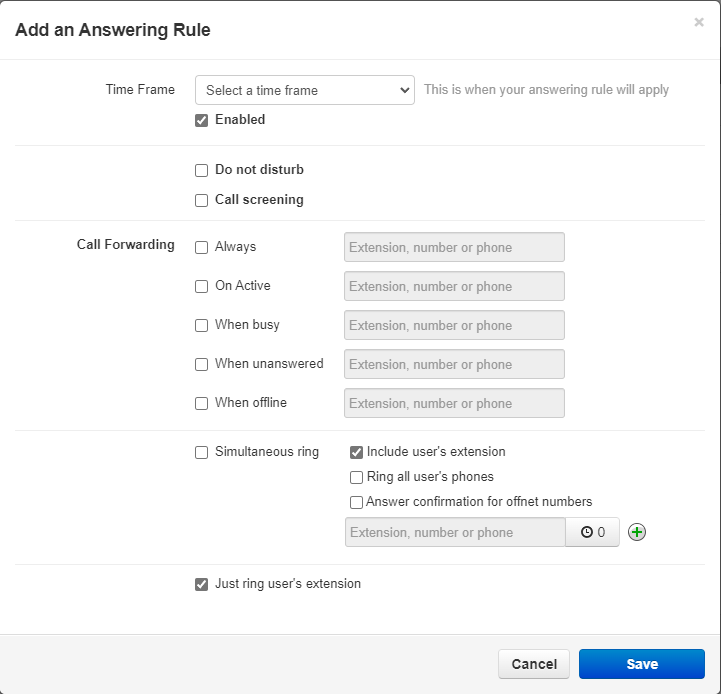
✔ The Add an Answering Rule modal will appear.

- Use the Time Frame drop-down to select the Temporary Forward time frame.

- To have this forwarding active immediately, leave the Enabled box selected.

✔ When the answering rule have been created, the forward will show as Active.

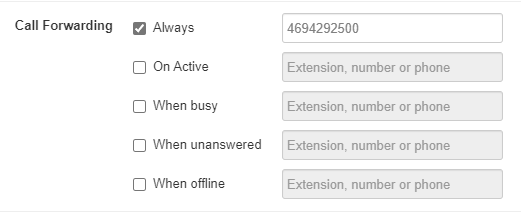
- In the Call Forwarding section, select Always and type in the destination for these forwarded calls.

Quick Tip: An extension number, phone number, auto attendant, etc. can be typed in as the destination.
- Click the Save button.

-
Reprioritize the answering rules list to ensure the Temporary Forward is above the Business Hours rule.

- When the temporary forwarding is no longer needed, click the Edit
 icon and deselect the Enabled box.