StratusFAX 2.0 - Portal Faxing
Learn how to access StratusFAX 2.0's secure, web-based Portal Faxing features.
Table of Contents
Requirements: StratusFAX 2.0 is a service that can be set up for your account by our team.
StratusFAX 2.0 Pricing
Virtual: $10 per DID (phone number) for fax-to-email (FTE) and portal faxing.
Adapter: $20 for each fax adapter per DID (phone number)
• If a fax machine will be used, there is a one-time charge for the purchase of an ATA Adapter if you do not currently own one.
User: $5 for each User that has a DID (phone number) for fax and voice.
If you would like assistance enabling StratusFAX 2.0, please contact our support team.
StratusFAX - Options
There are 3 potential ways a Stratus user would be able to fax:
- Portal Faxing - Inbound and Outbound faxing that is done through the Stratus Web Portal
- Fax-to-Email - Format and send an email with your fax attached to a recipient.
- Fax Machine - Use a fax machine with an ATA adapter connected to send a fax to a recipient using Fax over Internet Protocol (FoIP)
Send a Fax
Faxing with StratusFAX 2.0 can be done through the Stratus Web Portal. To send a fax using the web portal…
- Navigate to the Fax page.

Quick Tip: If you are signed in as an admin user, you may need to navigate to your personal account.
To do so, by click your name in the top right-hand corner of the screen and select My Account.
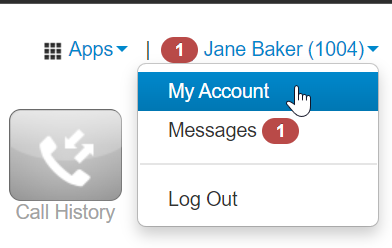
To get back to your account management view, click Manage Organization.

- To send a fax, click the Compose Fax button.

- In the Compose Fax menu, do the following:
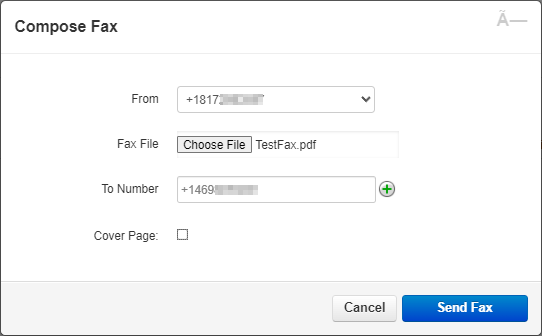
- From - Use the dropdown to select the fax number to send the fax with.
- Fax File - Click the Choose File button to select the document to be faxed.
-
To Number - Type the fax number to send the fax to.
Note: Make sure to add a +1 in front of the fax number.
If the phone number is not properly formatted, this warning will appear:

-
Cover Page - If needed, select Cover Page to add a first page to the fax with additional information for the recipient.
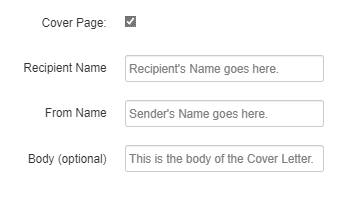
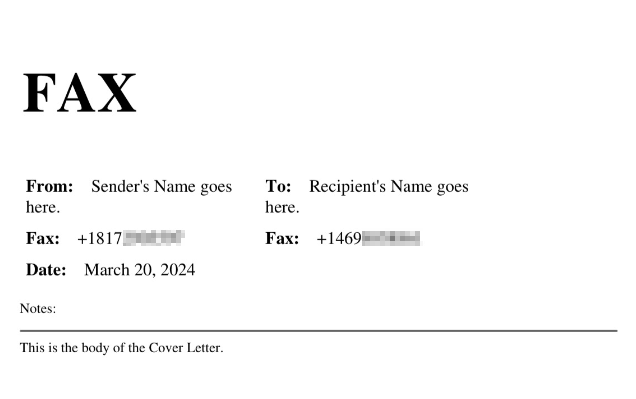
Quick Tip: The Cover Page becomes the first page in the delivered fax. It is often used to indicate the name of the company who is sending the fax and a brief description of the document being faxed.
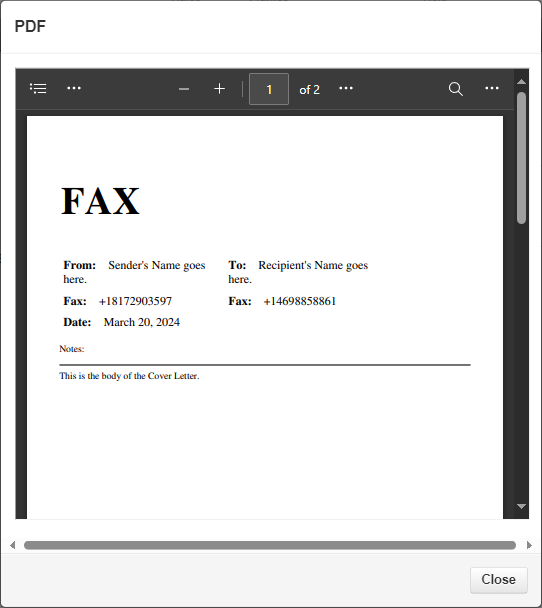
The cover letter will look similar to this:
- When ready, click the Send Fax button.
✔ Once a fax is sent, a confirmation email will be sent to your email address.
These confirmation emails that look similar to these examples: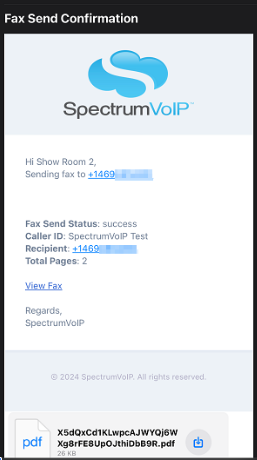

Quick Tip: If you cannot see these emails, please check the Spam or Junk folder of your email.
The recipient should receive a fax on either their fax machine or their email (depending on the setup of their own faxing service).
For recipients using fax-to-email, they should receive an email from no-reply@spectrumvoip.com with the fax's information and the fax file attached.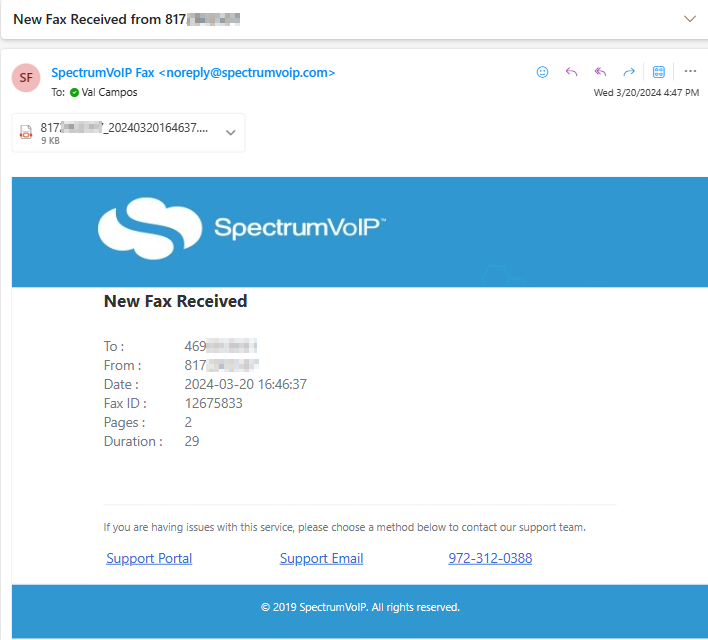
Monitor the Status of a Fax
To check the status of a fax that you have sent, view the Sent tab of your fax mailbox.
There will be status indicators next to fax messages to indicator their current progress. Refresh your browser's page to ensure you are viewing the most current information in this page.
-
new - The fax has just been created and is about to be sent out to the recipient's fax number.

-
processing - While a fax is in the process of sending, you may see the Fax Status show as “processing”. This means the fax is still transmitting. Please wait for the fax to complete its transmission. Depending on the size of the uploaded file, this could take several minutes.

-
success - If the fax has successfully been sent, the Fax Status will show as “success”.

-
failed - If an error has occurred while sending the fax, the Fax Status will show as “failed”. This means there was an issue sending that particular fax.

Quick Tip: If a fax has failed to send, it is recommended to check that the phone number is correctly typed in and a fax number. If a large fax is failing to be sent, sending the fax in batches may be a good solution.
View Your Faxing History
StratusFAX has two folders for managing faxes: the Inbox and Sent folders.
The Inbox tab is where you will be able to view any non-deleted inbound faxes to your user.

The Sent tab is where you will be able to view any non-deleted outbound faxes that have been sent via the Stratus Portal. This will not show faxes sent through other means, such as a Fax Machine using an ATA or through Fax-to-Email. 
While viewing faxes in these folders, you can…
- View the fax's information, such as the fax numbers for the sender and receiver, the total of pages sent, and more.
- Click the View Fax
 icon to view a copy of the fax that was sent.
- If needed, click the Remove
 icon to delete this fax log from your mailbox to declutter.
Your StratusFAX Settings
On the User Settings tab, you can set the following: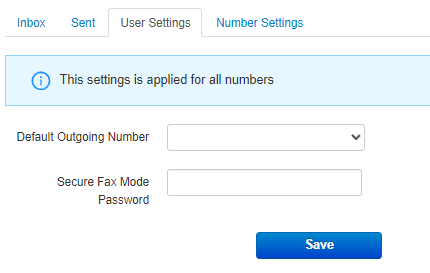
- Default Outgoing Number - If there are multiple fax numbers that can be used, you can select one that you would prefer to have shown on faxes sent by you.
-
Secure Fax Mode Password - Type in a password that recipients will need to enter in order to open and read faxes.
Note: Setting up a Secure Fax Mode Password can help make your faxing HIPAA compliant. Doing so will require the recipient to enter a password to open a fax's PDF attachment. This allows recipients to receive PDF attachments while ensuring that the fax still meets HIPAA privacy standards.
WARNING: To be sure that Secure Fax Mode will work properly for your users, check with our support team that Secure Fax Mode has been enabled for your fax number.
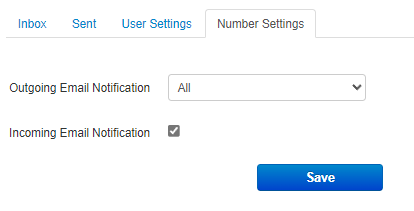
On the Number Settings tab, you can adjust the notifications you can receive for both inbound and outbound faxes.
-
Outgoing Email Notification - By default, you will receive email notifications for when an outbound fax fails to send or successfully sends. If needed, use the dropdown to adjust which notifications you should receive for the status of outbound faxes.

Note: You should receive confirmation emails that look similar to these:

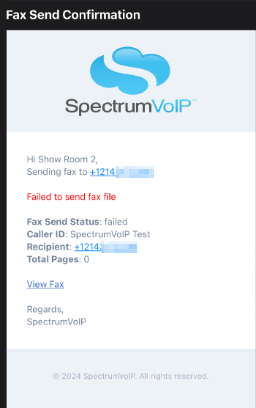
If you cannot see these emails, please check the Spam or Junk folder of your email.
- Incoming Email Notification - By default, an email will be sent to you when you receive an inbound fax. If needed, you can disable email notifications for inbound faxes.