Forward Your Own Phone's Calls
Discover how you can forward your own calls using different methods.

Written by Adrian Angwenyi
Updated at August 15th, 2025
Table of Contents
Stratus offers many ways to forward calls. This can be for emergencies such as power outages, or when you are simply away from your main phone for an extended period of time. This article goes over some of the most used ways to forward your calls.
Note: These forwarding options will only affect the user they are applied to.
For more information regarding the best practices for forwarding all inbound calls to a specific phone number, read this article.
Forward Calls by Dialing a Code
To set call forwarding using your SpectrumVoIP phone (e.g., desk phone, mobile app, web phone, or desktop app), dial * 7 2 and then the number you wish to forward the calls to, then press SEND.
- Example: Dial * 7 2 4 6 9 4 2 9 2 5 0 0 and press SEND. This will forward your calls to the phone number (469) 429-2500.
- Example: Dial * 7 2 1 0 5 and press SEND. This will forward your calls to the user at extension 105.
When dialing this from your device, you will hear a confirmation message to confirm the destination.
To disable the call forwarding set, dial * 7 3 and press SEND.
✓ You will hear a message confirming that calls forwarding has been disabled.
Simultaneously Ring Your Phones and a Phone Number
Stratus allows you to ring multiple destinations at the same time through its Simultaneous Ring feature in the user's Answering Rules. This is commonly used to ring all of your SpectrumVoIP devices (desk phone, mobile app, web phone, desktop app) at the same time. However, it can also ring off net numbers such as a cell phone. This is a great option as a backup.
There is also an option to set a delay on the numbers that are rung. For example, you can set your cell phone to ring if you have not answered your desk phone after 10 seconds.
Implement Simultaneous Ring for a User
To have a user's phones simultaneously ring…
1. Navigate to the Users page.![]()
2. Use the search bar to find the extension number or name of the user needing their new device to ring.
3. Click the Edit  icon next to the user and select Answering Rules.
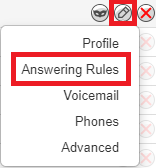
4. Click the Edit icon next to user's main answering rule.
Quick Tip: The main answering rule for most users is the Default rule.
5. In the Edit Answering Rule menu, select Simultaneous ring, Include user's extension, and Ring all user's phones.
6. If the user would like a cellphone number or another user's extension number to ring alongside their phones, type the extension number or telephone number in the Extension, number or phone box.
Quick Tip: If they want this phone number to ring after a small delay, click the Ring Delay button ![]() and use the slider to select how long (in seconds) the system should wait before ringing the telephone number.
and use the slider to select how long (in seconds) the system should wait before ringing the telephone number.
5 seconds = 1 ring.

If you want the person answering the call to hear a confirmation message, select Answer confirmation for offnet numbers.
![]()
Click the Record icon ![]() to record a message to play to the person answering the call to help them identify the call as work-related.
to record a message to play to the person answering the call to help them identify the call as work-related.
![]()
7. Click the Save button. ![]()
✔ Now all of the devices registered to that user should ring when their extension number is called, as long as the devices are registered.

Note: To learn more about Answering Rules, read this article.
Temporary Forward Rules
This method can be used when you are frequently needing forward to the same destination. This will create an answering rule that you can enable or disable through the Stratus Portal or the SpectrumVoIP Mobile App.
Implement a Temporary Forward Rule
Step 1: Create a Time Frame
To add a rule for a temporary forward, we will need to make a Time Frame. To do so…
1. Navigate to the Time Frames page.
2. In the list on the Time Frames page, select Domain.
3. Click the Add Time Frame button. ![]()
4. In the Add a Domain Time Frame menu, input the following:
• Name - Type an identifiable name for the time frame, such as “Temp FWD” or “Temporary Forward”
• When - Select one of the following:
– Always - Select this if this forward will be turned on and off. This is a great option for forwarding if you are not sure when the forward will need to be deactivated.
– Specific Dates - Select this if you know the date and time the forward will end.
5. Click the Save button. ![]()
✔ You should now see the new time frame listed along with any other existing ones.

Step 2: Create a Temporary Forward Answering Rule
Now that the Timeframe is created, we will need to apply it to the answering rules of the user that will need the forwarding.
Find the Destination of a Number
To find the user or function that callers are routed to when they dial one of your phone numbers, navigate to the Inventory page and check the phone numbers in the Phone Numbers tab.

1. Navigate to the Users page.![]()
2. In the search bar, type and select the name or extension number of the user that receives calls from your phone number.
3. Click the Edit icon and select Answering Rules.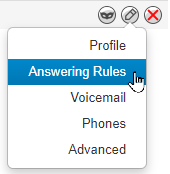
✔ You should now be able to see the answering rules currently being used by the user for call routing purposes.

4. Click the Add Rule button.![]()
5. In the Add an Answering Rule menu, use the Time Frame dropdown to select the new Temporary Forward time frame.
6. To have this forwarding active immediately, leave the Enabled box selected. ![]()
NOTE: If this forward is not currently needed, make sure Enabled is not selected.
![]()
7. In the Call Forwarding section, select Always and type the destination for these forwarded calls, such as a telephone number.

Quick Tip: An extension number, phone number, auto attendant, etc. can be typed in as the destination.
8. Click the Save button. ![]()
9. Reprioritize the answering rules list to ensure the Temporary Forward is above the Business Hours rule. 
✔ You should now see the Temporary Forward rule at the top of the answering rules list. This will ensure it takes precedence over any other rules that could be active at the same time.

10. When the temporary forwarding is no longer needed, click the Edit  icon next to the Temporary Forward rule and deselect the Enabled box.
![]()