iOS - The Layout of the SpectrumVoIP ES Mobile App
Learn how to get the most out of the SpectrumVoIP ES Mobile App using its handy tab bar.
Table of Contents
Overview
The SpectrumVoIP Stratus mobile app can be installed on iOS mobile devices and used to handle phone calls and send messages using the Internet.
This application supports the following call features:
- Inbound and outbound calls
- Call forwarding
- Call recording
- Voicemail
- Call transferring
- and more!
Tab Bar Icons

Touch the icons on the tab bar to navigate to the different screens available in your SpectrumVoIP Stratus app.
| Tab | Description |
|---|---|
|
Keypad - Use the dialer on the Keypad screen to call other extensions and phone numbers. |
|
Contacts - Your directory can be referenced in the Contacts screen. |
|
|
History - Check your call history using the History screen. |
|
Quickdial - Use this screen to save custom quick dials for your contacts. |
 |
Browser - Tap the Browser icon to view the Queue Panel. |
The Main Screen: The Keypad
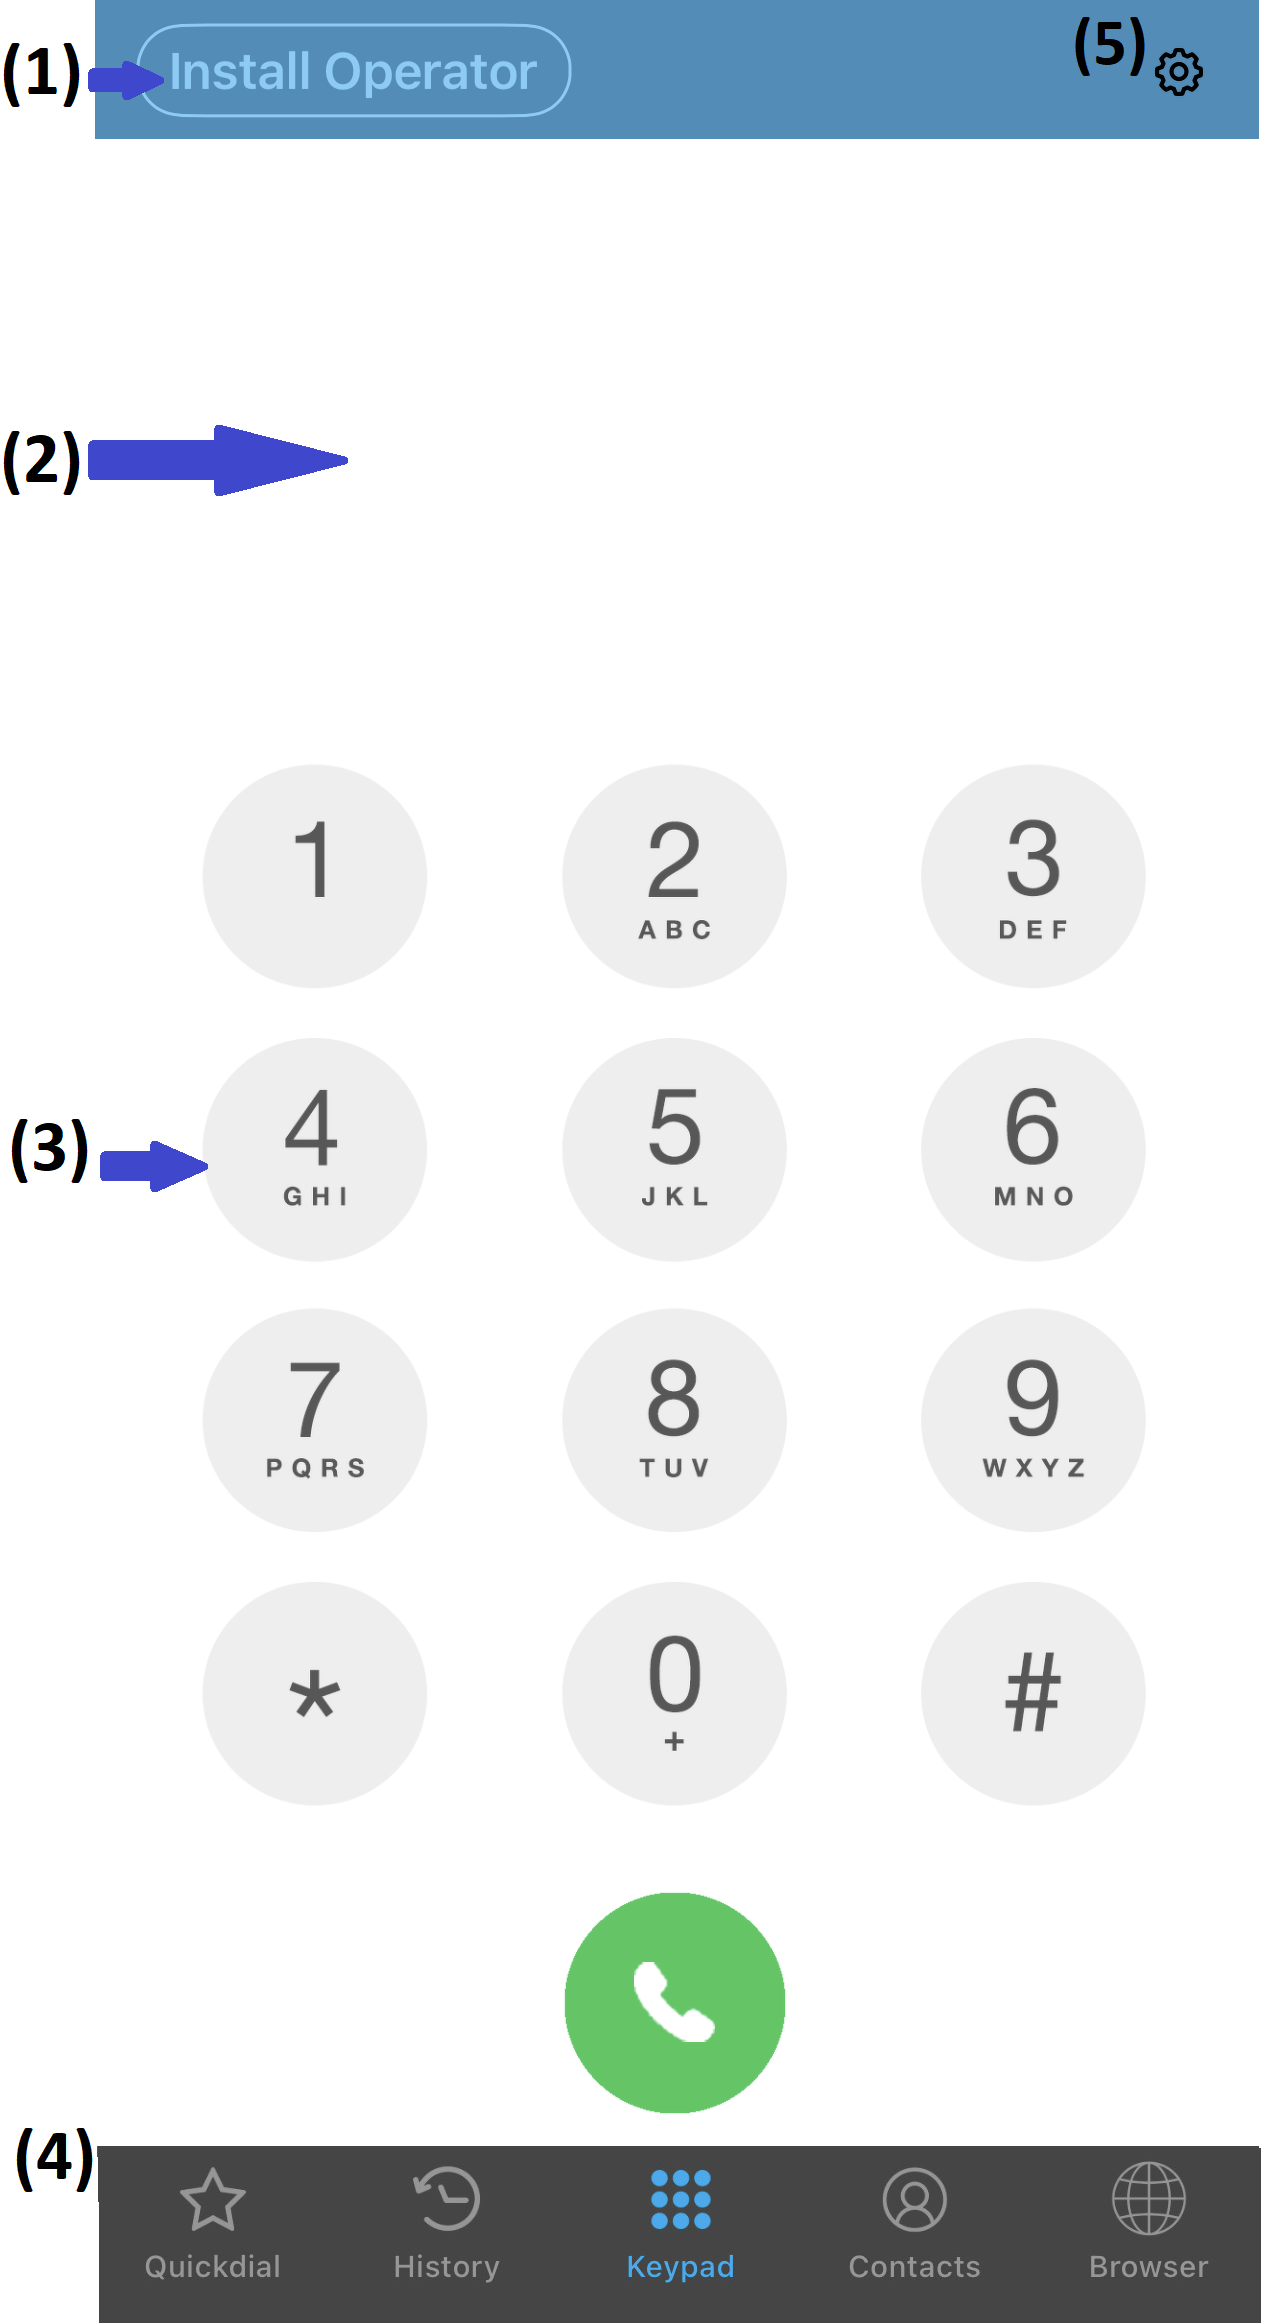
When you open up the application after closing, the Keypad screen will be displayed. This mobile app also has a Tab Bar (4) that exhibits the icons for each of the different screens of the app and a top bar that shows the Settings icon  (5) and the Registration Status (1) of your app.

- Touch an icon in the Tab Bar (4) to navigate to the corresponding screens.
- The Registration Status (1) displays your name. The color of the name indicates the registration status of your application.
- To begin using the application, make a call by tapping the number on the Keypad (3) and the numbers are displayed in the phone number field (2).
- To configure the application's settings, touch the Settings
 icon (5).
To learn more about making calls using the keypad, read this article.
The Quickdial Tab
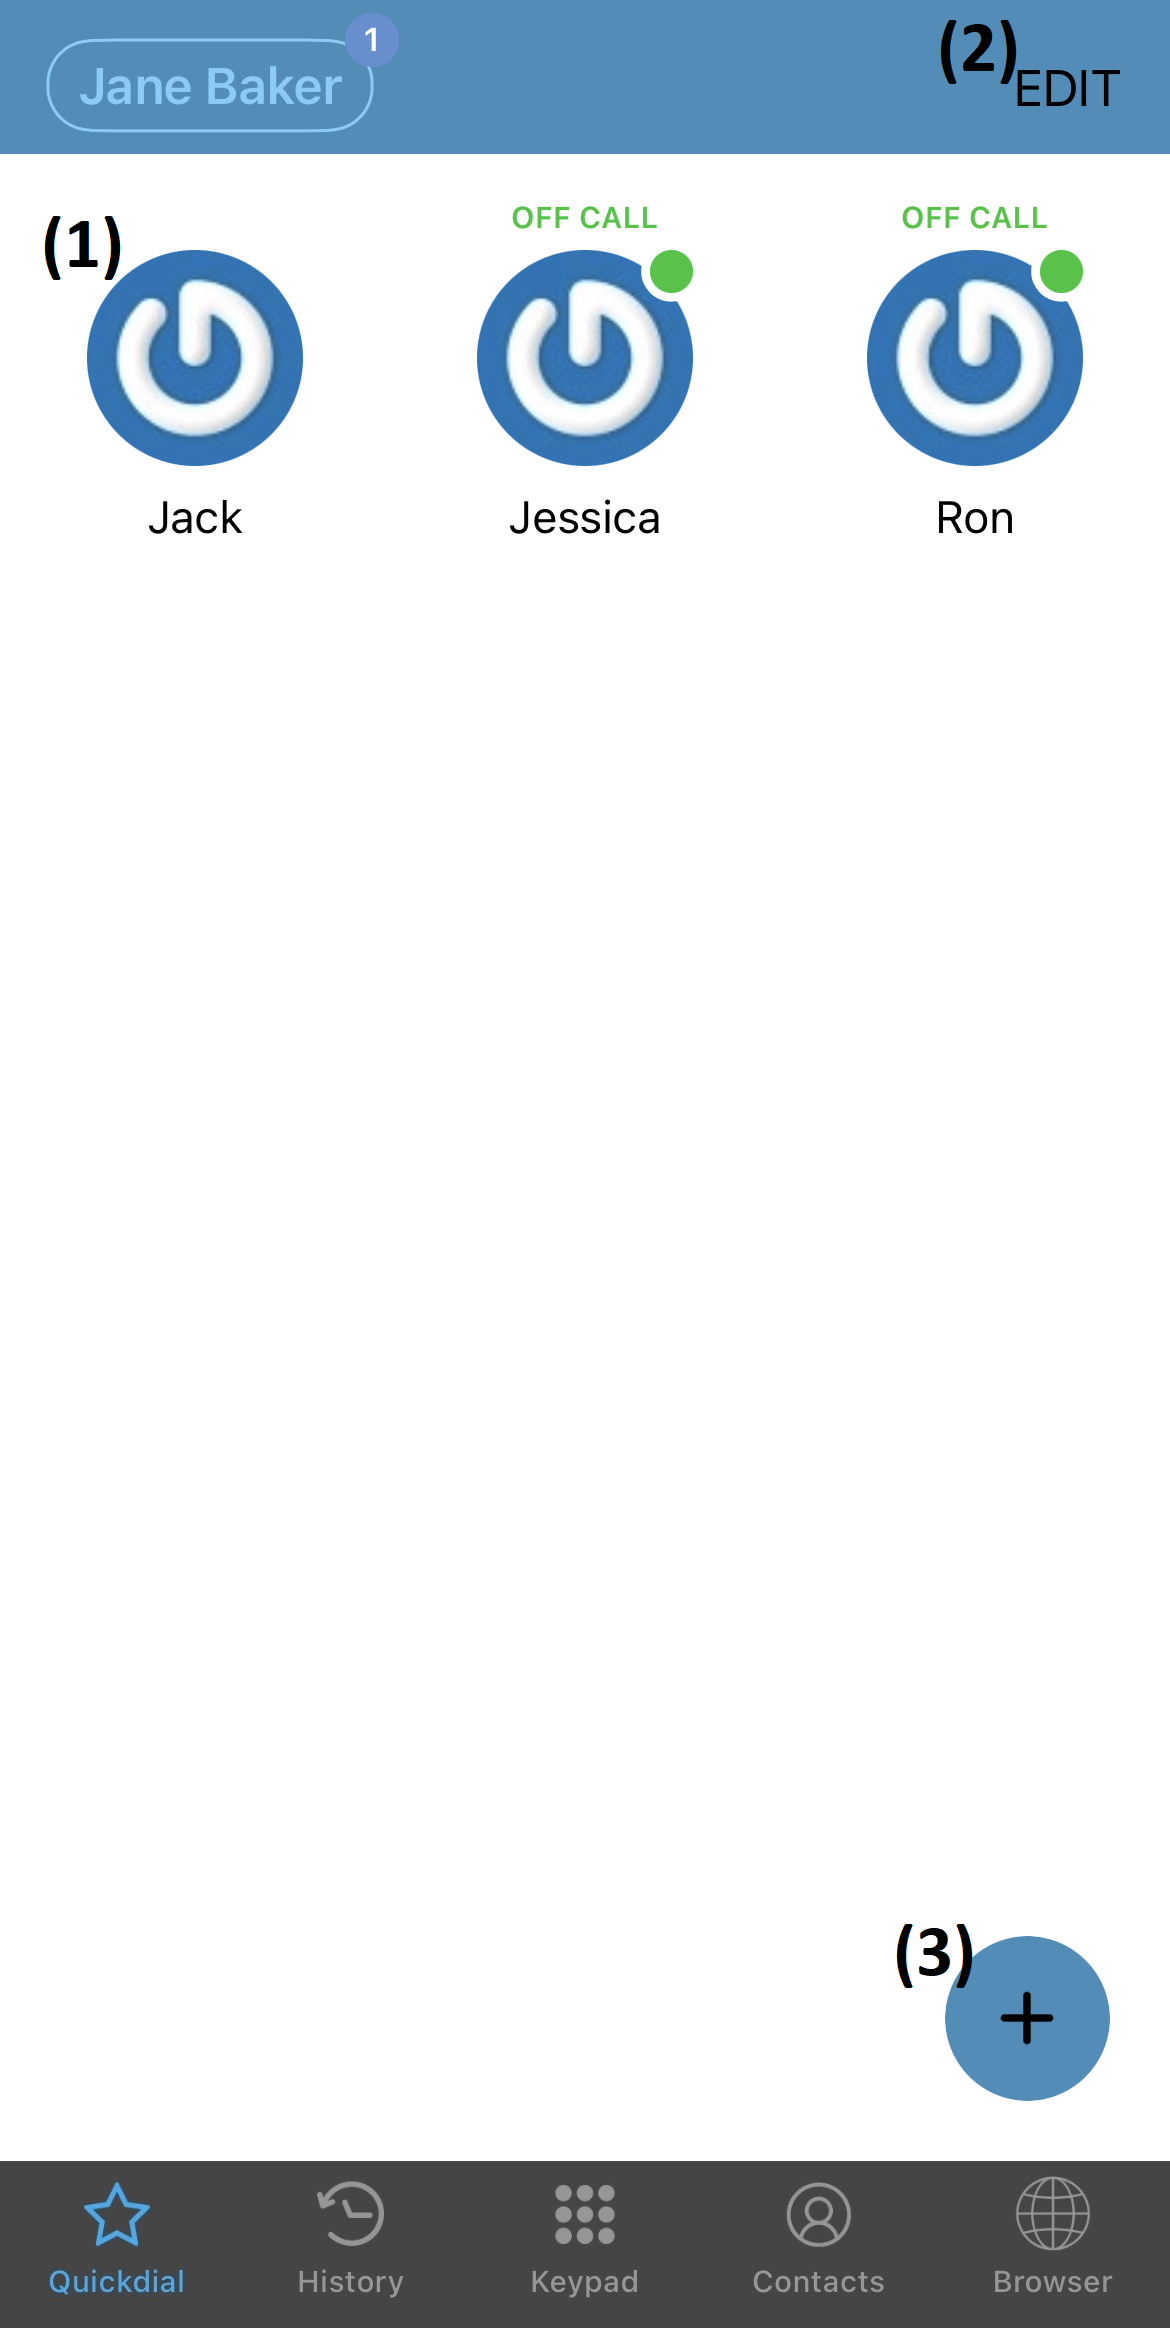
Quick dials act as a shortcut or speed dial for quickly contacting other people. A tap on a quick dial places the call instantly. These quick dials can also be used for other functions like transferring.

On the Quickdial  tab, you can Add (3) quick dials and EDIT (2) existing quick dials (1).
To learn more about adding and using quick dials, read this article.
The History Tab
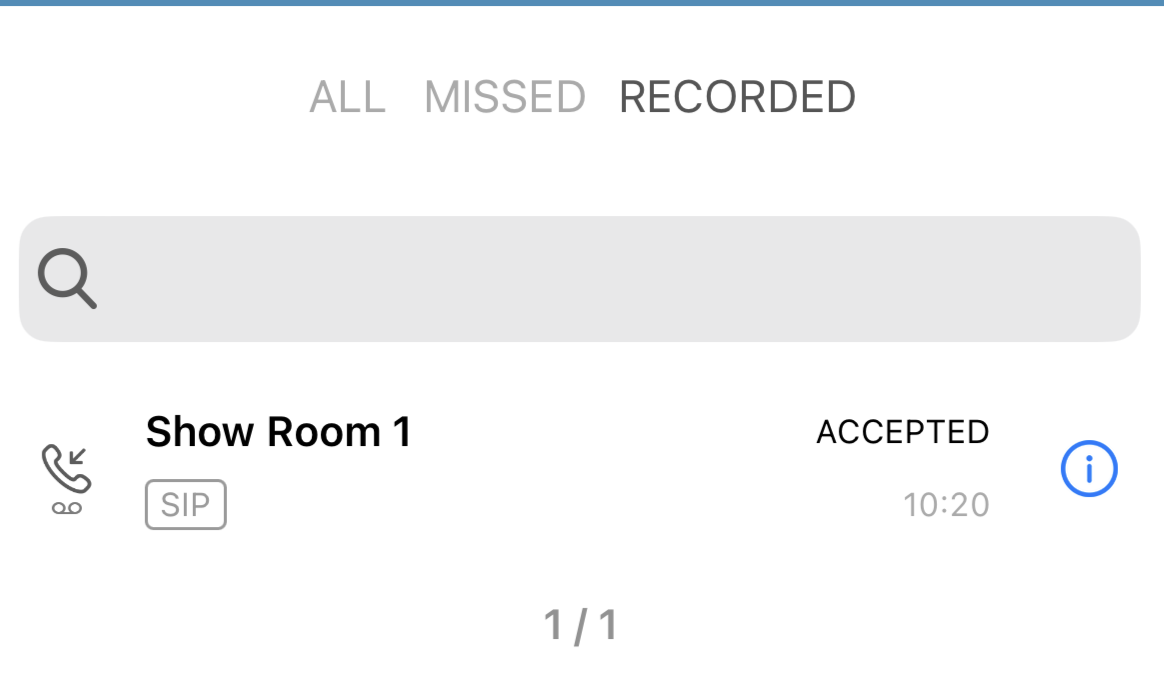
The History  tab records all the call logs from most recent to earliest. The call logs display the contact name or phone number, the call type, and the time of the call.

- On the History tab, you can check your call logs (5) and view the details (6) about a specific call history entry.
- You can use the ALL, MISSED, RECORDED filters (1) to look at specific types of calls.


- The search bar (4) can be used to find a specific call by searching for the caller's name, phone number or extension number.
- Touch the Save
 (3) icon to export the call logs to a CSV document. The user can then send it to other users or save it on the mobile device.
 - Touch EDIT (4) to delete call logs.
- Tap on the call logs to make calls.
To learn more about managing your call history, read this article.
The Contacts Tab
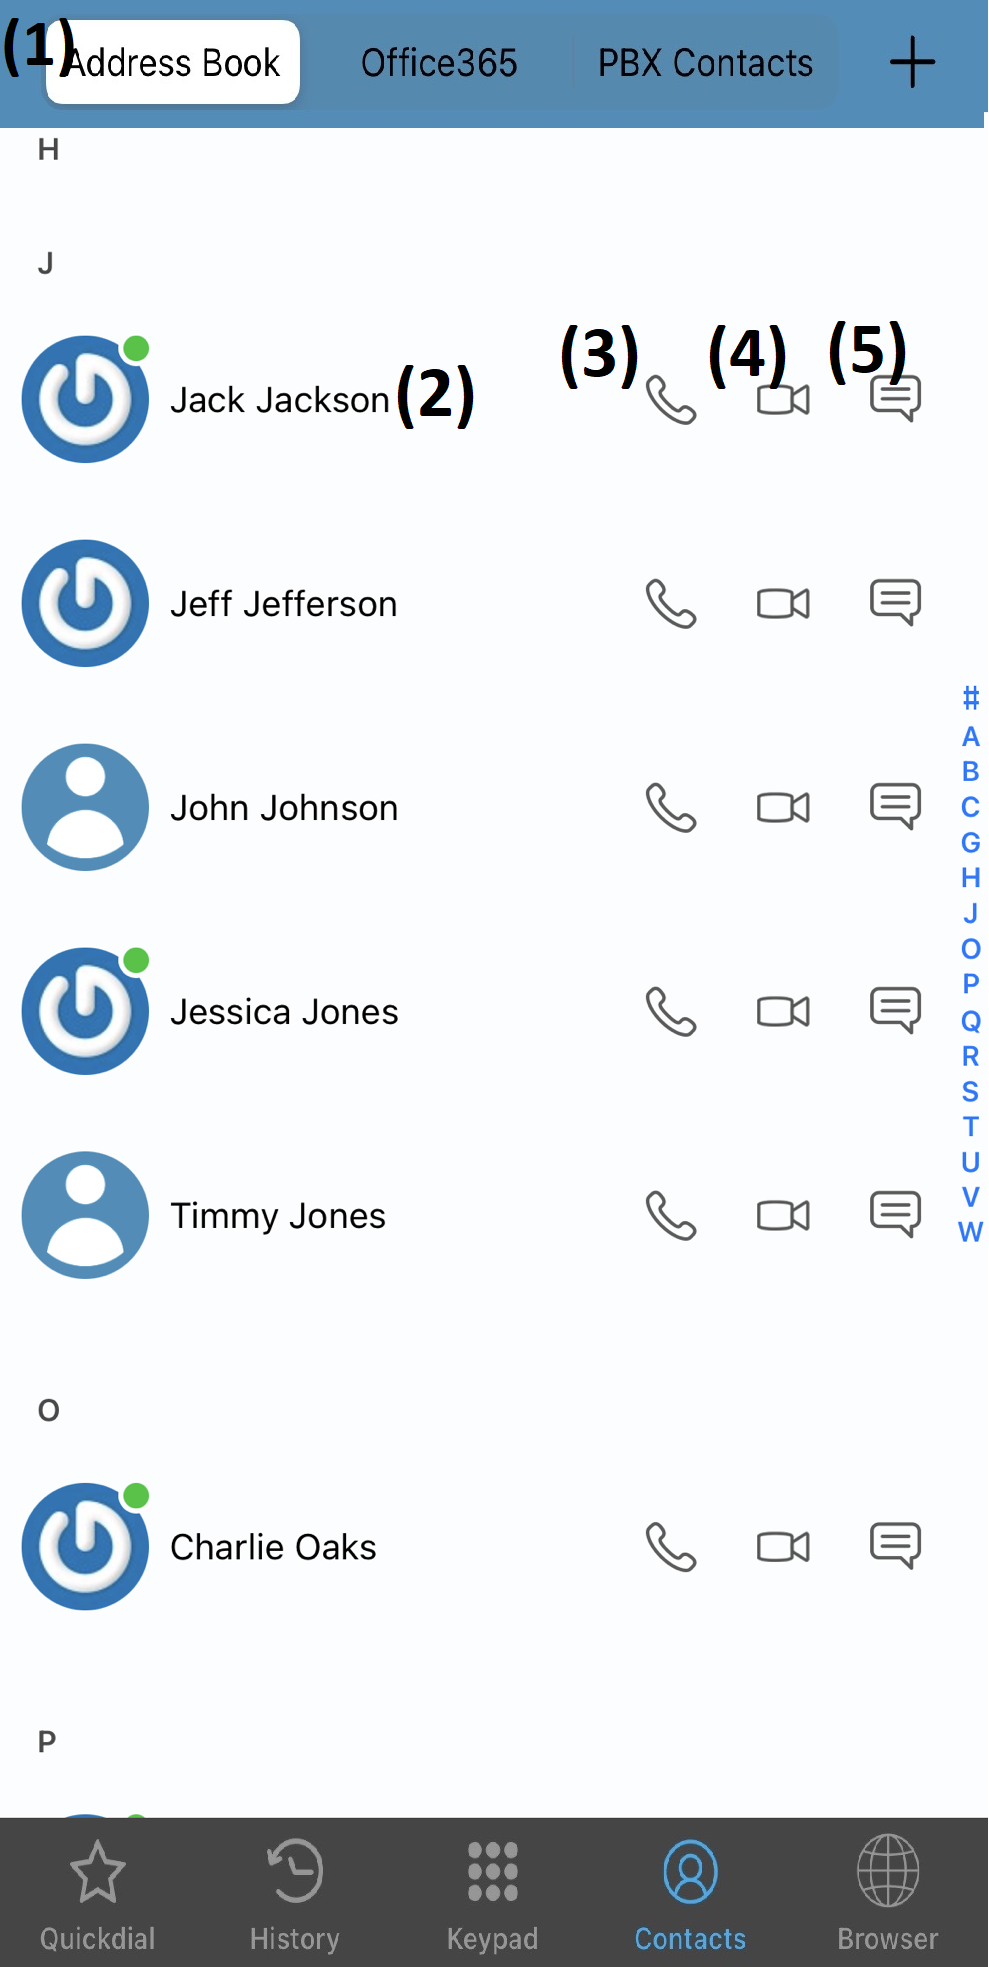
On the Contacts  tab, you can view and contact other people with ease.

- You can use the Address Book, Stratus Contacts, and Office365 filters (1) to sort through your contacts.
- If you allowed the app to read your mobile device's contacts, they can be viewed in the Address Book section.
- Your contacts from the Stratus web portal and this app can be viewed in the Stratus Contacts section.
- You can also view your Office365 contacts once you sign into your Office365 account through the app.
- To contact a specific contact (2), tap the Call
 (3), Video
  (4), or Message
  (5) icon next to their contact.
To learn more about viewing and adding contacts, read this article.
Browser: The Queue Panel
On the Browser  tab, you can view the Queue Panel (1) and any important information regarding the queue you are in.

Using this tool, you can…
- View your 7-digit extension number (2).
- Check the Name (3) of the queue that you are in.
- Look at and adjust your Current Status (4) in the queue.
- View the number of Calls Holding (5).
- Refresh (6) the queue panel to check for any changes.
- Change the view of the panel using the 1 and 2 buttons (7).
Check out this article to learn more about using the Browser tab.
