Access and Review Call Recordings in Stratus
Discover how you can download and listen to recordings of your calls in the Call History page.

Written by Val Campos
Updated at December 18th, 2025
Table of Contents
Using the Stratus web portal and our products, you and your users can record calls. To be able to record calls, call recordings have to be enabled. Call recording can be enabled for your whole business, a specific user, or a call queue through the Stratus web portal.
Note: If you would like to learn more about call recordings and how you can enable call recordings, review this guide:
Record Calls as a Stratus User
IMPORTANT: If call recordings are enabled, SpectrumVoIP will host the recordings in the web portal for 30 days. After that time has passed, the call recording will no longer be available to listen to or download. This time can be extended at an additional cost.
If you would like to extend your call storage time for your account, you can speak with our Billing team by calling (469) 429-2500 and selecting Option 2 or emailing billing@spectrumvoip.com.
Another alternative is to have all call recordings pushed to a virtual drive as seen in this guide.
If you would like to push call recordings to cloud storage or a virtual drive, contact our technical support team by calling (469) 429-2500 and selecting Option 4, emailing support@spectrumvoip.com, or sending in a ticket using our knowledge base or our support website.
Once call recording has been enabled, you can download and listen to any calls that have been recorded. To do so…
- Navigate to the Call History page.

NOTE: Your call history view may differ depending on your User Scope.
For example, users set as Office Mangers will be able to view all call recordings on the domain, while users set as Basic User will only be able to view their own calls. - The Call History can be filtered by different parameters such as phone number, user, or date/time. Click the Filter button to filter what calls are shown.

- In the right-hand menu of the call history listing, there will be a recording icon to listen to the call and a download icon to download the recording. Your button select may differ depending on your user scope.

- If a Call does not have a recording, the icon will be grayed out and will display No Recording when hovering over it; as shown below.
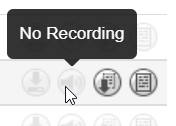
Note: If you see No Recording when call recordings should be enabled, please contact our technical support team to ensure your account has call recordings enabled.
- If a call has a recording that is still being processed, you might see Pending Conversation or Looking up; as shown below. For these, simply wait for the call to be processed and it will eventually become available to play and download.
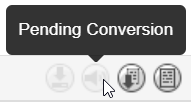

Quick Tip: Call recordings can take 30 minutes or longer to show in the Call History page.
It is recommended to wait an hour and then refresh or visit the Call History page again.
- If a Call does not have a recording, the icon will be grayed out and will display No Recording when hovering over it; as shown below.
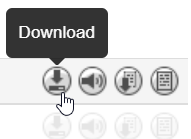
- When a recording is available, the Download
 and Listen
  icons will become active and clickable.
- Clicking the Download icon will save the audio file to your computer:
- Clicking Listen icon allows you to play the recording.

Note: If you are using the AI Sentiment and Transcription service, the Listen
icon will pull up the Call Transcript menu instead. 
Review a Call Transcript
In the Call Transcript menu, you will be able to listen to the recorded call, view a summary of the call, and review the dialogue that took place in the call. You can also download a CSV spreadsheet of this transcript's logs.

# Feature Description (1) Play / Pause Button Start or pause the playback of this recorded call. (2) Playback Bar View the duration of the call as the call is played.
You will see colored sections that indicate sections where a specific caller was speaking.
You can click on sections of the playback bar to skip ahead to listening to that section of the call. The Transcript section will update to show the dialogue of the speaker in that portion of the call.(3) Summary / Topics In this section, you can select between viewing the call's Summary and Topics:
• Summary - View a generated description of the conversation that took place between the speakers in this call.

• Topics - Review the three most important topics discussed in the call.
(4) Transcript Review and scroll through the dialogue from each of the speakers in this call. Each section of dialogue will be color-coded to match the color of the sentiment the dialogue was designated. (5) Search Box Type in a word or phrase that you would like to view in the transcript. The Transcript section will update to show the pieces of dialogue that includes the word(s) you searched for.

(6) Speakers View the user(s) and caller(s) that participated in the call that was recorded. (7)
Sentiments
Click a sentiment to hide/show dialogue in the call that was determined to match that sentiment.
For example, to only see dialogue with Positive sentiment, make sure only Positive is selected.

(8) Download Transcript Button If you need a copy of this transcript for your records, click the Download Transcript button to download a CSV spreadsheet.

This spread sheet will include the comments made in the conversation, and the timestamps for when each comment was made.
- Clicking the Download